I was in need of some storage in my tiny bathroom, and decided a jewelry armoire would be just the thing. I wanted a fairly simple style, and something that was cheap (of course), so I went onto my favorite shopping site, Craigslist, and found this little number. Isn't she a beauty ;)
She's a looker huh! I primed her with some spray Kilz, then sprayed her with Krylon's Ocean Breeze, threw some glaze on there, and voila! So much better, and sooo cheap. Love it!
April 29, 2011
The Ugly Butterflies
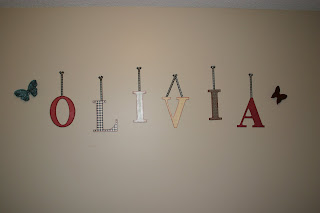
So here are the ugly butterflies that I found at an estate sale recently. The only reason I got them is because my 2 1/2 year old is really into butterflies right now. I knew I could paint them, so I decided what the heck, they are cheap. Here is what they looked like before.
Here they are after a couple coats of paint, and a touch of glaze~
Much better, and now my daughter can see butterflies everyday.
Here they are after a couple coats of paint, and a touch of glaze~
Much better, and now my daughter can see butterflies everyday.
Garage sale chairs
Here are some of my garage sale find chairs that I have refinished. Chairs are so easy and fun that I can't resist one if I find it (for the right price of course).
Before~
After~
Before~
After~
Before~
After~
Before (these chairs are part of a dining set that is shown below)~
After~
Before~
After~
Before~
After~
Before~
After~
Before (these chairs are part of a dining set that is shown below)~
After~
My free chairs
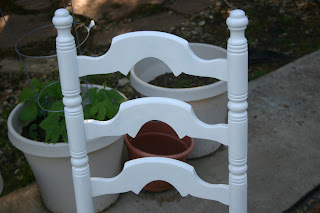
Back in October I found a set of 4 free ladderback chairs sitting on the side of the road, so of course I snatched them up. When I got them, the woven seats were falling apart, the stain was rubbed off in some areas, and they weren't in the best shape, but they had serious potential. I haven't totally finished them, but I did finish priming them, and it is getting me a little excited!
Here is what the chairs looked like when I first got them~
Here are the chairs after removing the weaving, and giving them a rough sanding~
Here they are after priming~
Now I can't wait to get them painted and glazed, hopefully this weekend if all goes to plan, then it will be on to making a new upholstered seat for these bad boys! Yayyy
April 19, 2011
Child's couch recovered
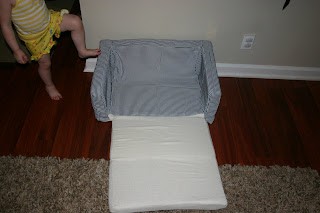
I am just beginning the process of learning to sew, but I think I did a pretty darn good job recovering this garage sale couch that my daughter wanted. This couch was pretty stained, and the foam pieces were pulling apart, and it was in serious need of some TLC. I took before and after pictures, but didn't get pictures of the process since I am new to the sewing world, and was kind of learning as I went along. I am glad that this is now something that I can have in my living room that doesn't make my eyes hurt! On the bottom of the couch, there is a zipper, so the cover can be removed and washed (necessary when you have young kids!). I removed the zipper from the original cover to use on the new one. You could also just use elastic, and make a casing around the bottom of all of the fabric, thread the elastic through, sew the ends of the elastic together, and just leave it open at the bottom.
Here is the couch before~
Here is the couch after~ (I still have to attach the velcro to keep the seat fabric down when the couch is open, but it is much better)
Look at these lines though, perfectly aligned. Way to go me!
Here is the couch before~
Here is the couch after~ (I still have to attach the velcro to keep the seat fabric down when the couch is open, but it is much better)
Look at these lines though, perfectly aligned. Way to go me!
April 17, 2011
Hutch transformation
I found this hutch for FREE on craigslist! It wasn't the best looking thing, but I knew it had potential. These are the steps I took to achieve this look
I will get better pictures posted soon, but these were the only ones I could find at the moment.
1. I started off by sanding it down with fine sandpaper, just to rough it up a bit
2. I sprayed it with Kilz primer
3. I did another fine sand to get a smooth finish
4. I sprayed it with Ivory colored Krylon spray paint (All Things Thrifty has a great tutorial on spray painting technique)
5. I decided that I did not want it white, so I spray painted over it with a blackish brown color (can't remember the name of it at the moment)
6. With a fine grit sandpaper, I lightly sanded the flat surfaces, and the edges until I got the desired amount of wear
7. i sprayed the knobs with the black/brown color, let the dry, then painted over them with the Ivory, let that dry, then I lightly sanded over the knobs to give them a worn look as well.
8. I sealed it with a gloss lacquer.
Here are some before and after shots
I will get better pictures posted soon, but these were the only ones I could find at the moment.
Subscribe to:
Posts (Atom)


